前回Let’s Encryptを導入してサイトをhttps化しました。
今回はMySQLの後継MariaDBとphpMyAdminをインストールしてデータベースを使える環境を作ろうと思います。
最新記事がありますので、そちらをご覧いただくことをおすすめします。
最新記事を表示するには以下のボタンをクリックしてください。
MariaDBとphpMyAdminをインストールしてWordPressを立ち上げる
0.前々回の記事に示した方法で外部レポジトリを追加し、NginxとPHPをインストールしておきます。
1.まずphp用のモジュールをインストールしておきます。
yum install php-mysqlnd
2.モジュールが使えるようにphpを再起動します
systemctl restart php-fpm
3.MariaDBをインストールするためのレポジトリを追記します。
vim /etc/yum.repos.d/MariaDB.repo
# MariaDB 10.1 CentOS repository list - created 2017-02-23 06:49 UTC
# http://downloads.mariadb.org/mariadb/repositories/
[mariadb]
name = MariaDB
baseurl = http://yum.mariadb.org/10.1/centos7-amd64
gpgkey=https://yum.mariadb.org/RPM-GPG-KEY-MariaDB
gpgcheck=1
4.MariaDBをインストールします。
yum install MariaDB-server MariaDB-client
5.MariaDBの設定ファイルを編集し、標準の文字コードを指定しておきます。
vim /etc/my.cnf
[mysqld]
character-set-server=utf8

[client]
default-character-set=utf8
6.MariaDBの自動起動を有効化し、起動します。
systemctl enable mariadb.service
systemctl start mariadb.service
7.以下のコマンドを実行して、MariaDBの初期設定を行います。
mysql_secure_installation
8.質問にすべて答えていきます。
Enter current password for root (enter for none)
#最初はパスワードが設定されていないのでこのままEnter
Set root password? [Y/n]
#[Y]キーを押して、パスワードを設定します。
Remove anonymous users? [Y/n]
#anonymousユーザーはテスト用のユーザーなので、[Y]キーを押して削除します。
Disallow root login remotely? [Y/n]
#データベースに外部からアクセスできるかどうかを選択します。
#インストールしたVPS内だけで使用する場合は[Y]キーを押してリモートログインを禁止します
Remove test database and access to it? [Y/n]
#testデータベースはテスト用のデータベースなので、[Y]キーを押して削除します。
Reload privilege tables now? [Y/n]
#すぐに設定を反映するか聞かれるので、[Y]キーを反映します。
9.PHPの設定を変更しておきます。
vim /etc/php.ini
date.timezone = "Asia/Tokyo"

mbstring.language = Japanese
mbstring.internal_encoding = UTF-8
mbstring.http_input = pass
mbstring.http_output = pass
mbstring.encoding_translation = Off
mbstring.detect_order = UTF-8,SJIS,EUC-JP,JIS,ASCII

expose_php = Off
session.sid_length = 32
session.sid_bits_per_character = 5
chown nginx:nginx /var/lib/php/session
10.phpMyAdminをインストールします。
yum install --enablerepo=remi phpMyAdmin
11.phpMyAdminの各種設定を変更します。
vim /etc/httpd/conf.d/phpMyAdmin.conf
# phpMyAdmin - Web based MySQL browser written in php
#
# Allows only localhost by default
#
# But allowing phpMyAdmin to anyone other than localhost should be considered
# dangerous unless properly secured by SSL

Alias /phpMyAdmin /usr/share/phpMyAdmin
Alias /phpmyadmin /usr/share/phpMyAdmin


   AddDefaultCharset UTF-8


     # Apache 2.4
     Require all granted
     # ↑ Requireを「local」から「all granted」に変更
12.Nginxの設定を変更します。
vim /etc/nginx/conf.d/ssl.conf
    location ^~ /phpmyadmin {
       alias /usr/share/phpMyAdmin;
       index index.php index.html;
       location ~ ^/phpmyadmin/(.+\.php)$ {
         alias /usr/share/phpMyAdmin/$1;
         fastcgi_index index.php;
         fastcgi_pass  127.0.0.1:9000;
         fastcgi_param SCRIPT_FILENAME $document_root$fastcgi_script_name;
         include       fastcgi_params;
       }
    }
13.phpMyAdminの所有者がroot:apacheとなっているのでnginxに変更します。
chown -R root:nginx /etc/phpMyAdmin
14.設定が完了したら「ドメイン名/phpmyadmin」へアクセスしてみましょう。ユーザー名は「root」、パスワードはMariaDBのパスワードを入力すればOKです。
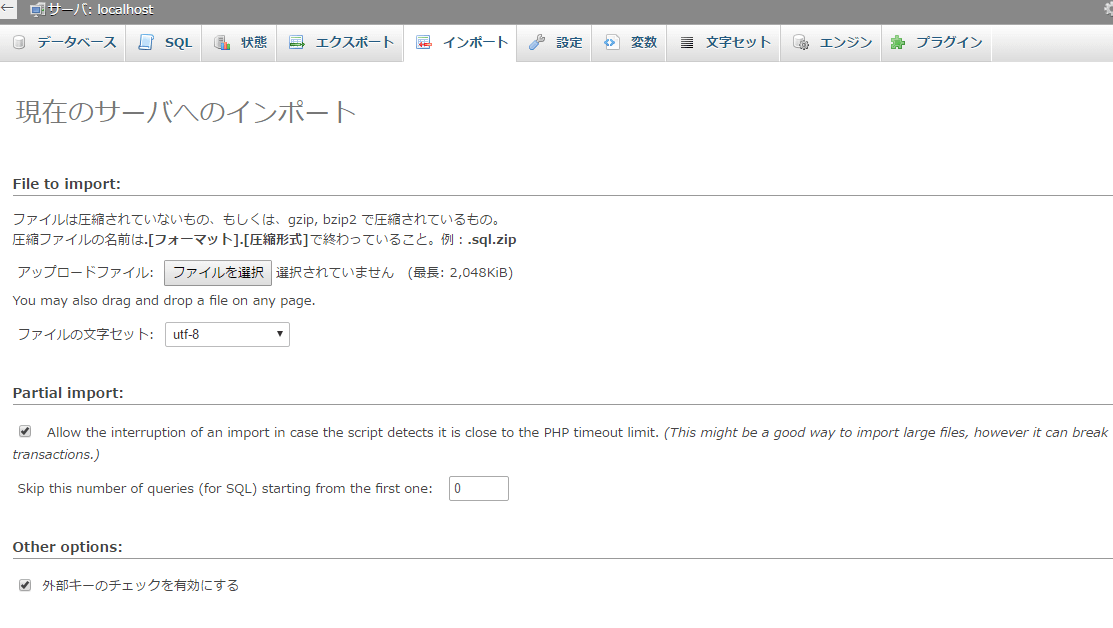
15.create_tables.sqlをホームディレクトリに取り出し、SFTPでダウンロードしておきます。
cp /usr/share/phpMyAdmin/sql/create_tables.sql /home/ユーザー名/create_tables.sql
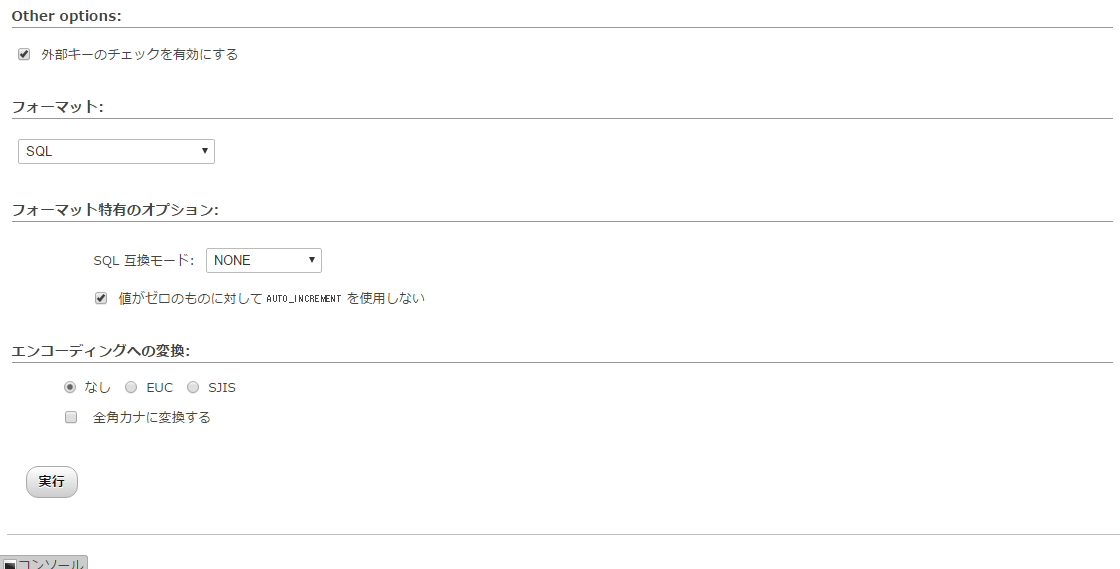
16.上部のインポートからcreate_tables.sqlを選択して実行します。
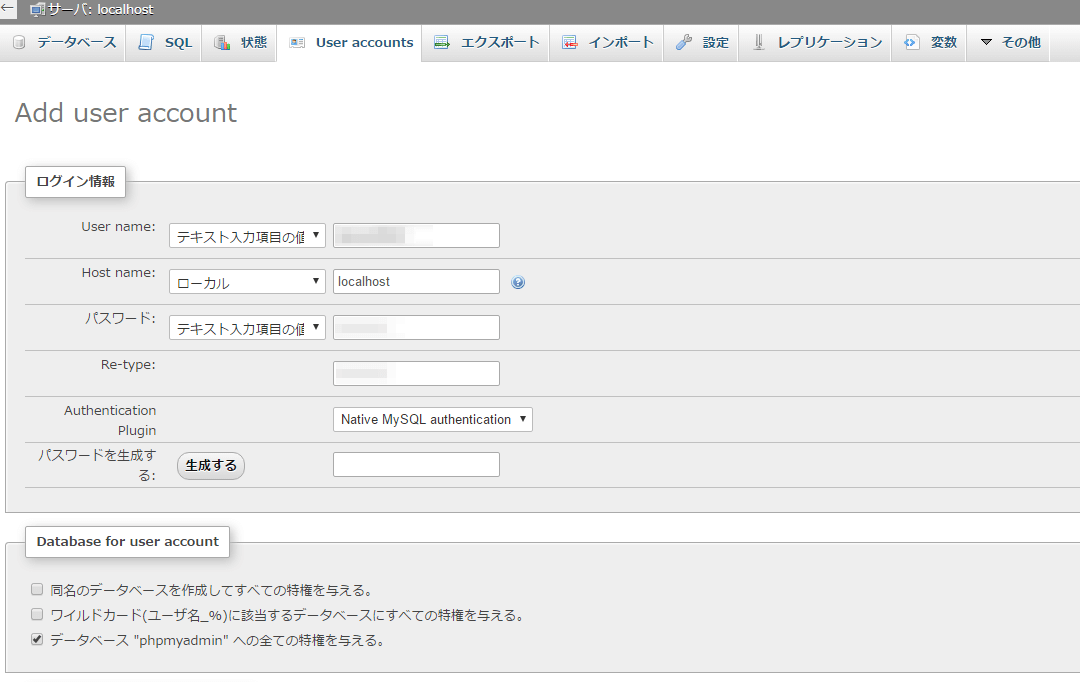
17.左のメニューからphpmyadminデーターベースを選択肢、上部の特権をクリック。ユーザーの新規作成をクリックします。
18.ユーザー名とパスワードを入力し、ホスト名をローカルに、データベース”phpmyadmin”へすべての特権を与えて、ユーザーを作成します。
18.phpMyAdminの設定を変更します
vim /etc/phpMyAdmin/config.inc.php
/**
 * phpMyAdmin configuration storage settings.
 */

/* User used to manipulate with storage */
$cfg['Servers'][$i]['controlhost'] = '';
$cfg['Servers'][$i]['controlport'] = '';
$cfg['Servers'][$i]['controluser'] = '作成したユーザー名';
$cfg['Servers'][$i]['controlpass'] = '作成したパスワード';

/* Storage database and tables */
$cfg['Servers'][$i]['pmadb'] = 'phpmyadmin';
$cfg['Servers'][$i]['bookmarktable'] = 'pma__bookmark';
$cfg['Servers'][$i]['relation'] = 'pma__relation';
$cfg['Servers'][$i]['table_info'] = 'pma__table_info';
$cfg['Servers'][$i]['table_coords'] = 'pma__table_coords';
$cfg['Servers'][$i]['pdf_pages'] = 'pma__pdf_pages';
$cfg['Servers'][$i]['column_info'] = 'pma__column_info';
$cfg['Servers'][$i]['history'] = 'pma__history';
$cfg['Servers'][$i]['table_uiprefs'] = 'pma__table_uiprefs';
$cfg['Servers'][$i]['tracking'] = 'pma__tracking';
$cfg['Servers'][$i]['userconfig'] = 'pma__userconfig';
$cfg['Servers'][$i]['recent'] = 'pma__recent';
$cfg['Servers'][$i]['favorite'] = 'pma__favorite';
$cfg['Servers'][$i]['users'] = 'pma__users';
$cfg['Servers'][$i]['usergroups'] = 'pma__usergroups';
$cfg['Servers'][$i]['navigationhiding'] = 'pma__navigationhiding';
$cfg['Servers'][$i]['savedsearches'] = 'pma__savedsearches';
$cfg['Servers'][$i]['central_columns'] = 'pma__central_columns';
$cfg['Servers'][$i]['designer_settings'] = 'pma__designer_settings';
$cfg['Servers'][$i]['export_templates'] = 'pma__export_templates';
#ここまでのコメント行を外す

/**
 * End of servers configuration
 */
19.データベースが出来たので、Wordpressが動作するようにPHPに書き込み権限を与えます
#自分のユーザーをnginxグループに入れ
usermod -aG nginx takumi9942
#公開ディレクトリの所有者をnginxにします
chown -R nginx:nginx /usr/share/nginx/html/
#最後にset GIDビットを立てて完了です
chmod 2775 /usr/share/nginx/html/
20.ついでにメールも送信できるように設定しておきます。
vim /etc/postfix/main.cf
#以下を変更
myhostname = ドメイン名
myorigin = $myhostname
これでWEB環境の構築は一通り完了です。
VPSって大変ですね(;´д`)トホホ…