PHPで操作するモダンな掲示板Flarumのインストール方法と日本語化の手順について紹介します。
必須環境
Flarumをインストールするには、以下のパッケージがインストールされたサーバーが必要です。
- Apache (mod_rewriteが必要) もしくは Nginx
- PHP 7.2.9以上
- MySQL 5.6以上 もしくは MariaDB 10.0.5以上
- サーバーへのSSH (コマンドライン) アクセス
インストール方法
1. Composerのインストール
まず、Composerをインストールします。公式サイトのDownloadページを開き、「Command-line installation」の手順に従って、Composerをインストールします。SSHでサーバーに接続し、「Command-line installation」に記載されている以下の4つのコマンドを順番に実行します。
php -r "copy('https://getcomposer.org/installer', 'composer-setup.php');"
php -r "if (hash_file('sha384', 'composer-setup.php') === 'c31c1e292ad7be5f49291169c0ac8f683499edddcfd4e42232982d0fd193004208a58ff6f353fde0012d35fdd72bc394') { echo 'Installer verified'; } else { echo 'Installer corrupt'; unlink('composer-setup.php'); } echo PHP_EOL;"
php composer-setup.php
php -r "unlink('composer-setup.php');"
sudo mv composer.phar /usr/local/bin/composer
2. Flarumのダウンロード
次に、Flarumをダウンロードします。mkdirコマンドでダウンロード先のフォルダを作成し、composerコマンドでFlarumをダウンロードします。このとき、Web公開ディレクトリよりも上のディレクトリにダウンロードすることをオススメします。(PHPの実行ユーザーがapacheグループに所属していない場合は、apacheを書き換えてください)
# Nginxの場合
cd /usr/share/nginx
sudo mkdir flarum
sudo chown 自分のユーザー名:apache ./flarum
cd flarum
composer create-project flarum/flarum .
# Apacheの場合
cd /var/www
sudo mkdir flarum
sudo chown 自分のユーザー名:apache ./flarum
cd flarum
composer create-project flarum/flarum .3. 権限の設定
次に、書き込みが必要なフォルダに書き込み権限を追加します。chownコマンドとchmodコマンドでapacheグループに権限を与えます。(PHPの実行ユーザーがapacheグループに所属していない場合は、apacheを書き換えてください)
sudo chown -R 自分のユーザー名:apache インストール先/flarum/public/assets
sudo chown -R 自分のユーザー名:apache インストール先/flarum/storage
sudo chmod 775 インストール先/flarum
4. 日本語化(任意)
Flarumは標準では英語表記となっています。日本語の言語パックをインストールするには以下のコマンドを実行します。(自作なので誤訳があるかもしれませんが・・・)
composer require flarum-lang/japanese5. 公開ディレクトリの移動
手順2でFlarumをブラウザからアクセスできない範囲にインストールしました。そのため、一部のディレクトリをブラウザからアクセスできる場所に移動する必要があります。mvコマンドでpublicディレクトリを移動します。
sudo mv ./public Web公開フォルダ/forum6. 「site.php」と「index.php」の編集
手順5でpublicフォルダを本来の場所から移動させたため、内部ファイルの参照先を変更します。2つのファイルを開き、それぞれ1行づつ編集します。
# vimコマンドでファイルを開きます。vimの使い方は他のサイトを参考にしてください。
vim インストール先/flarum/site.php
/*
|-------------------------------------------------------------------------------
| Configure the site
|-------------------------------------------------------------------------------
|
| A Flarum site represents your local installation of Flarum. It can be
| configured with a bunch of paths:
|
| - The *base path* is Flarum's root directory and contains important files
| such as config.php and extend.php.
| - The *public path* is the directory that serves as document root for the
| web server. Files in this place are accessible to the public internet.
| This is where assets such as JavaScript files or CSS stylesheets need to
| be stored in a default install.
| - The *storage path* is a place for Flarum to store files it generates during
| runtime. This could be caches, session data or other temporary files.
|
| The fully configured site instance is returned to the including script, which
| then uses it to boot up the Flarum application and e.g. accept web requests.
|
*/
return Flarum\Foundation\Site::fromPaths([
'base' => __DIR__,
'public' => __DIR__.'/../html/forum', //←ここを編集:site.phpから見た「手順5で移動したディレクトリ」の相対パスを入力します
'storage' => __DIR__.'/storage',
]);
# vimコマンドでファイルを開きます。vimの使い方は他のサイトを参考にしてください。
vim Web公開フォルダ/forum/index.php
/*
* This file is part of Flarum.
*
* For detailed copyright and license information, please view the
* LICENSE file that was distributed with this source code.
*/
$site = require '../../flarum/site.php'; //←ここを編集:index.phpから見た「インストール先ディレクトリ内のsite.php」の相対パスを入力します7. Nginxの設定変更(Nginxのみ)
Nginxを使用している場合は、設定ファイルを追記します。
# Nginxの設定ファイルを開きます。(サーバーによってはdefalut.confでない場合があります)
sudo vim /etc/nginx/conf.d/defalut.conf
server {
listen 80 default_server;
server_name _;
root /usr/share/nginx/html;
index index.php index.html;
# 以下の3行を追加する。(forumは手順5のディレクトリ名に置き換えること)
location /forum {
try_files $uri $uri/ /forum/index.php?$query_string;
}
# PHPのリバースプロキシが記載されていない場合は、以下も追記する。
location ~ \.php$
{
try_files $uri =404;
fastcgi_pass 127.0.0.1:9000;
fastcgi_index index.php;
fastcgi_param SCRIPT_FILENAME $document_root$fastcgi_script_name;
include fastcgi_params;
}
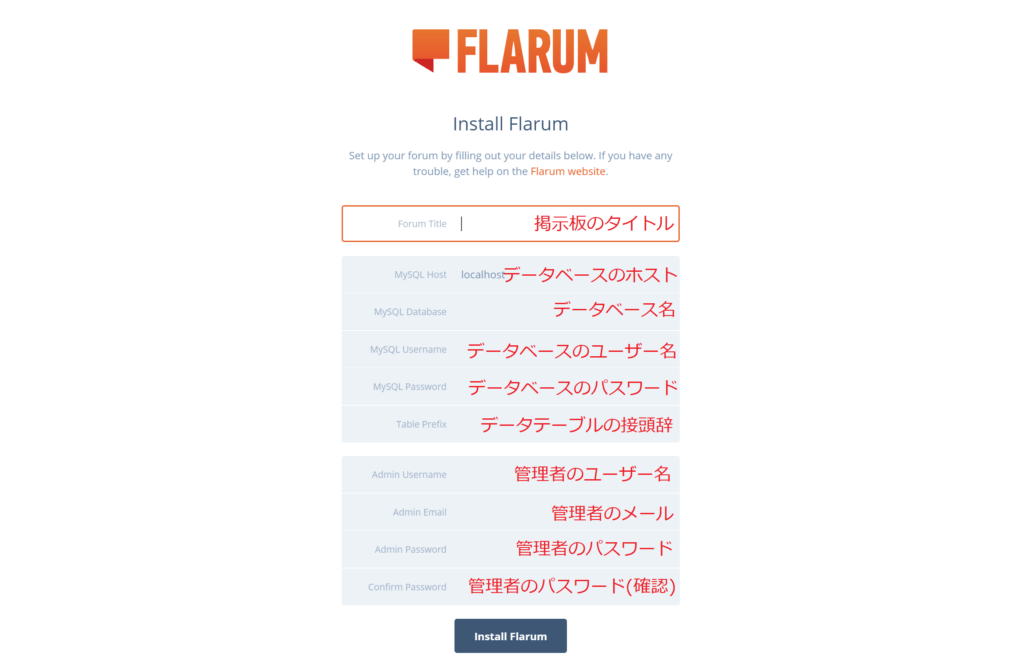
}8. データベースと管理アカウントの設定
以上でコマンドライン上の操作は終了です。ブラウザを開き、手順5のディレクトリにアクセスします。(今回の例の場合は http://ドメイン/forum/)
9. 日本語化(任意)
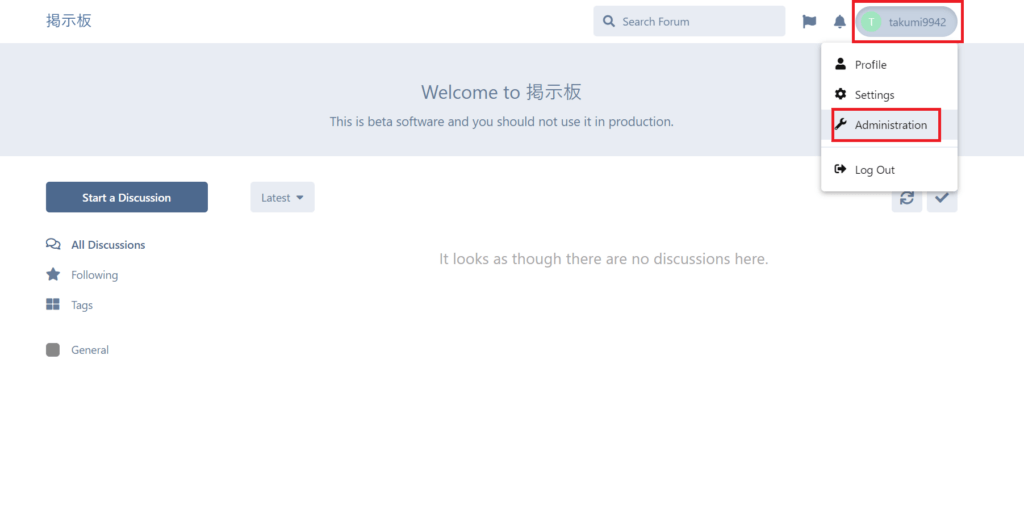
以上でインストールは完了です。手順4で日本語の言語パックをインストールした場合は、右上のユーザー名をクリックし、「Administration」をクリックします。
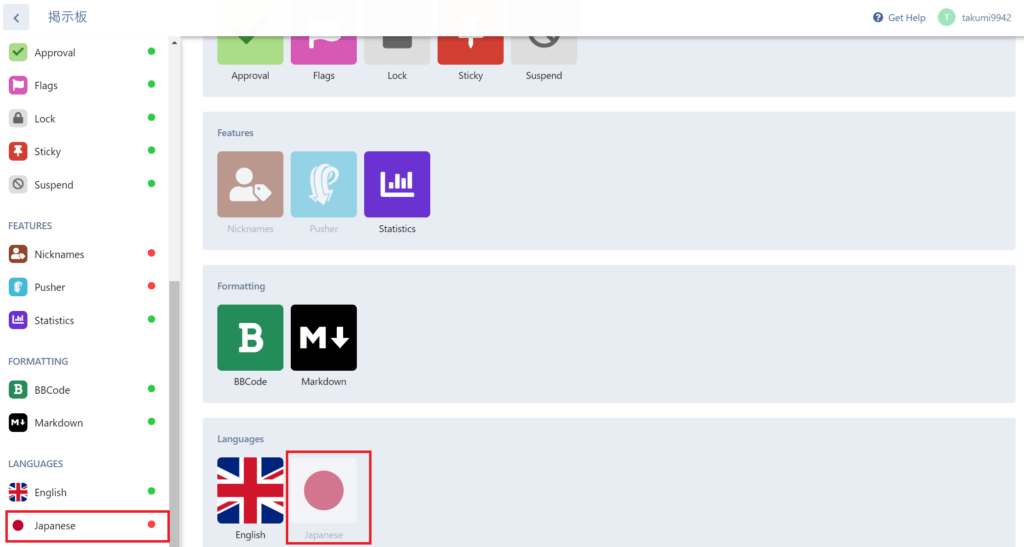
”左側のメニュー”もしくは”ダッシュボード”の一番下から「Japanese」をクリックします。
(Japaneseが表示されない場合は、手順4のコマンドをFlarumのインストール先で実行してください)
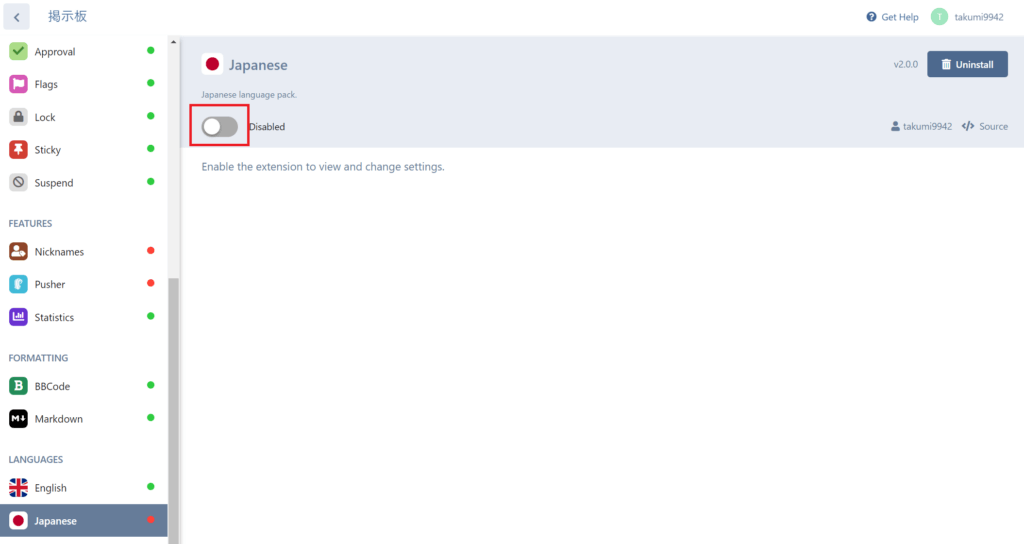
“Disabled”の左側のトグルボタンをクリックして有効化します。
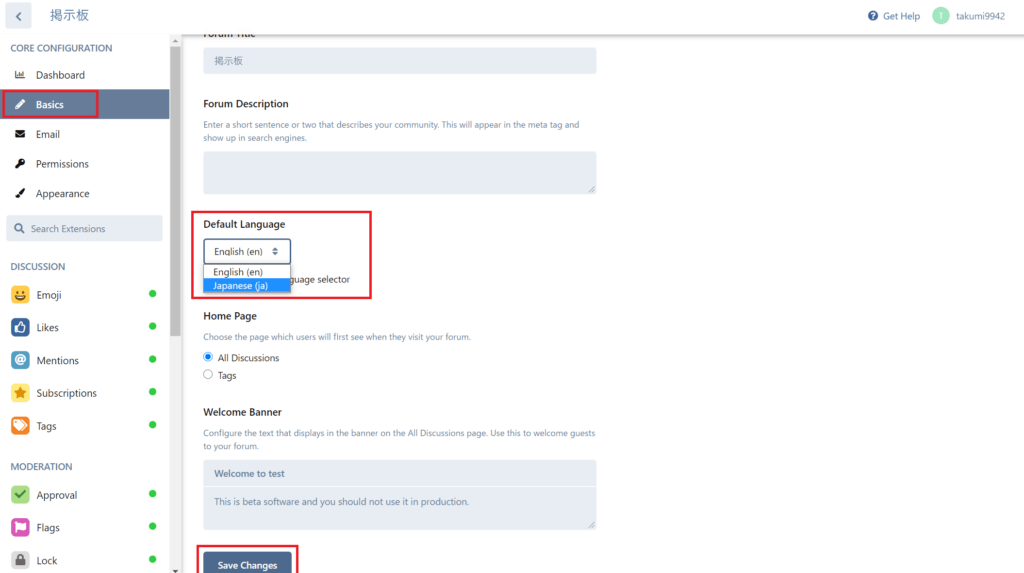
左側のメニューから「Basics」を選択し、右側の「Default Language」を「Japanese (ja)」に変更し、最下部の「Save Changes」をクリックします。
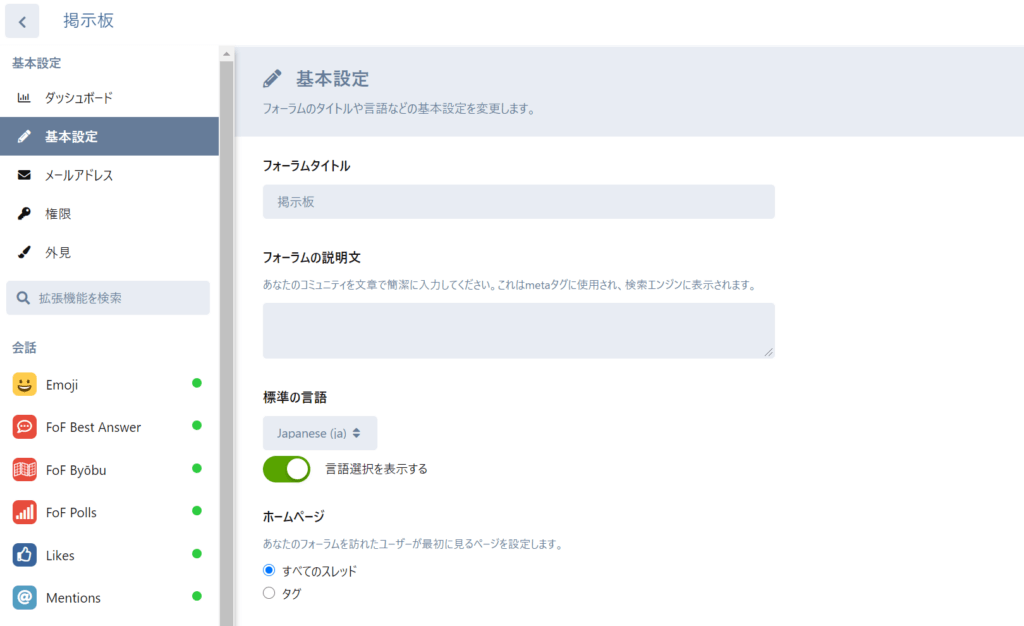
ページを更新すると、日本語に切り替わります。
以上でインストールと日本語化は完了です。お疲れさまでした!